NestJS Basics#2 - Building Interfaces with Controllers
Building our application from scratch
Welcome to the Part 2 of NestJS Basics.
We completed the first stage of our NestJS learning journey. Some of the things we covered in the previous post:
Bootstrap a NestJS project using Nest CLI
Understanding the role of
main.tsMaking the right platform choice
It is time to take the next step.
The Plan
In this post, we are going to look at building interfaces using controllers in NestJS.
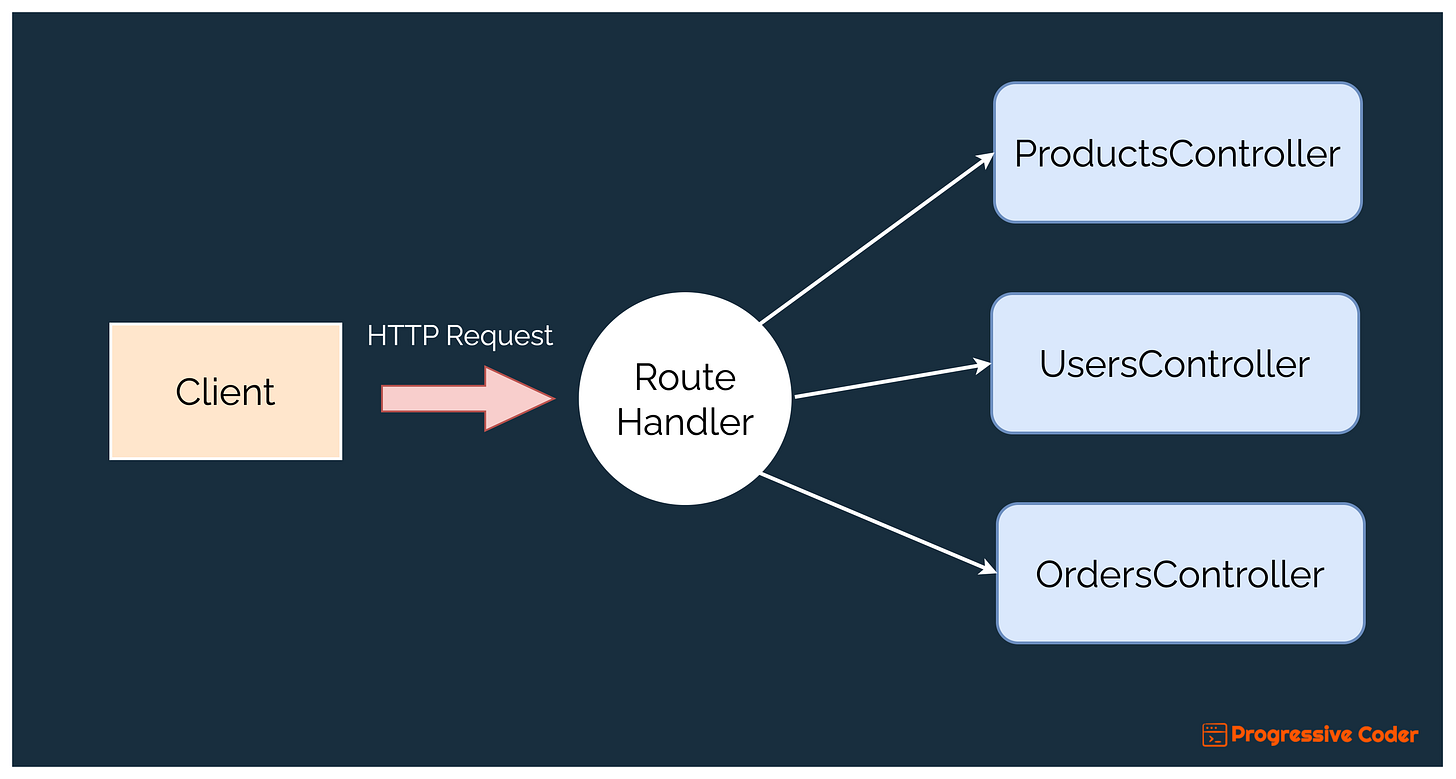
As you can see in the below illustration, controllers help us group together route handlers based on functionality. In my view, they are one of the most important concepts in NestJS.
Here’s the plan for the post:
Creating a simple NestJS Controller
Introduction to classes and decorators
Understanding the Request & Response objects
Seeing the
@Param()&@Body()decorators in actionWhat’s next?
Want to master NestJS but haven't joined ProgressiveCoder's paid subscription yet?
Don't delay, click the link below and join now to gain instant access to the course and unlock exclusive content and support.


